Reading Your Property Like a Map: A Seasonal Guide to Finding the Best Solar Light Placement Zones
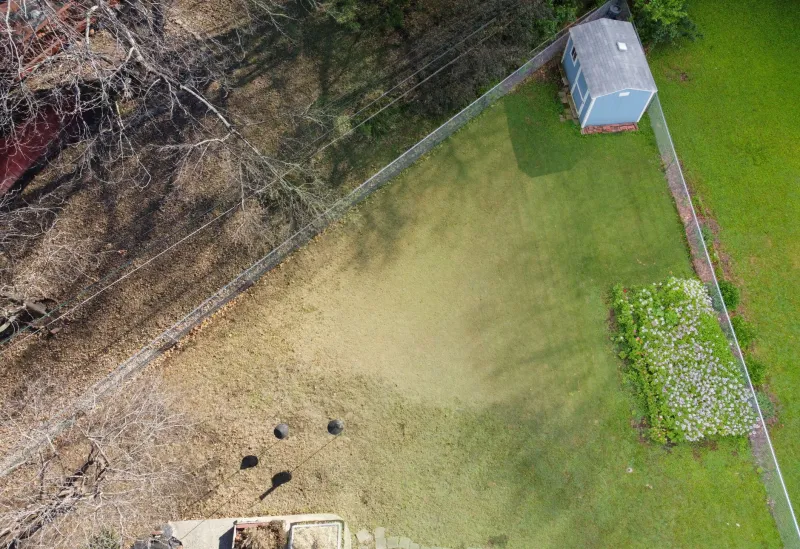
Many homeowners approach solar light placement as a single decision made during installation and rarely revisited. A fixture goes into the ground, the panel faces generally southward, and the assumption is that the job is done. In reality, the relationship between your property and the sun is dynamic, shifting meaningfully with every passing month. The placement that captures abundant solar energy in July may be buried in shade by November. The corner that seems perpetually shadowed in March may become a high-yield charging location by June.
Understanding this seasonal variability — and knowing how to assess it without expensive professional help — is one of the most valuable skills a solar lighting owner can develop.
Why Sun Angle Changes Everything
The sun does not travel the same arc across the sky throughout the year. In summer, it rises high and follows a long, sweeping path, providing intense solar radiation for extended hours. In winter, it hugs the southern horizon, tracing a much shorter arc and casting long, oblique shadows even at midday.
For solar panels, this has direct consequences. A panel mounted at an angle optimized for summer sun may receive far less direct irradiance in December. Trees, fences, rooflines, and structures that cast negligible shadows in summer can completely shade a panel during winter's low-angle solar geometry.
The practical implication is that effective solar light placement requires thinking in four dimensions: the three spatial dimensions of your yard, plus time across the calendar year.
Conducting a Spring Assessment
Spring is an excellent starting point for a solar placement audit, primarily because deciduous trees are still leafless or just beginning to bud. This offers a rare window of visibility — you can observe your yard's true solar exposure before the full tree canopy returns.
Begin by spending time outdoors at three distinct moments: shortly after sunrise, around solar noon (typically between 12:00 and 1:00 PM local time), and approximately two hours before sunset. At each interval, note which areas of your property receive direct sunlight and which fall into shadow. A simple notebook or smartphone photo log works well for this purpose.
Pay particular attention to the following:
- Roof overhangs and eaves: These cast surprisingly wide shadows during spring's moderate sun angles.
- Fence lines and walls: Solid structures create shadow bands that shift throughout the day.
- Young trees and shrubs: A sapling that casts minimal shade today may represent a significant obstruction within three to five years.
Mark your highest-performing zones — those that receive four or more hours of direct sunlight across all three observation windows — as primary candidates for solar light placement.
The Summer Audit: Peak Performance and Hidden Surprises
Summer's high sun angle creates conditions that are simultaneously the most favorable for solar charging and the most misleading for long-term planning. Because the sun rises well north of due east and sets well north of due west during summer months, areas on the north side of structures may receive unexpected direct sunlight in the early morning and late afternoon.
Conversely, tall structures and dense tree canopies that appeared open in spring may now cast deep, persistent shade. Conduct your summer assessment in late June or early July, repeating the three-interval observation method from spring. Compare your notes carefully. Areas that performed consistently across both seasons are your most reliable year-round placement zones.
Summer is also the time to identify locations where solar panels may overheat. In regions with intense summer sun — particularly the Southwest and parts of the South — panels mounted on surfaces that reflect heat, such as concrete or light-colored pavers, can experience elevated operating temperatures that modestly reduce charging efficiency. Where possible, orient panels to receive direct sun without unnecessary reflective heat exposure.
Fall: The Early Warning System
September and October serve as a critical preview of winter conditions. As the sun's arc begins to lower, shadows lengthen noticeably. Structures that seemed harmless in summer — a garden wall, a neighbor's mature oak, a pergola — may begin casting shadows across panels that were previously unobstructed.
This is the ideal season to proactively reposition any fixtures that are beginning to underperform. Moving a solar light in October, before winter conditions reduce performance further, is far preferable to troubleshooting a system that has been struggling silently for months.
Fall is also the moment to assess tree canopy changes. As deciduous trees lose their leaves, you gain a clearer view of branch structures that may have been hidden all summer. Heavy branch coverage overhead, even without leaves, can reduce panel output by intercepting a meaningful percentage of diffuse light on overcast days — which are disproportionately common in winter.
Winter: The True Performance Test
Winter placement assessment is the most demanding and the most revealing. The sun's path is shortest and lowest, meaning the margin for error in panel orientation is smallest. A panel that is even slightly off-angle during winter months may capture a fraction of the solar energy available to a well-positioned alternative just a few feet away.
For the winter assessment, focus your observation on solar noon, when the sun reaches its highest point in the sky. This is when panels receive their most direct irradiance, and it is also when shadow patterns are at their most compressed and predictable. Any panel that falls into shade during this window is effectively losing its best charging opportunity of the day.
In northern states — Minnesota, Michigan, Wisconsin, the New England region — winter days may be short enough that even ideally positioned panels struggle to fully charge batteries. In these climates, prioritizing the absolute best south-facing, unobstructed locations for the most critical lighting zones is especially important.
Practical Tools for the DIY Assessor
Several tools make this process more precise without requiring professional expertise. Smartphone applications that display real-time sun position, azimuth, and altitude — such as Sun Surveyor or SunCalc — allow you to visualize where the sun will be at any time of year from any location on your property. Standing at a proposed installation point and using one of these applications to project winter sun angles can reveal shadow conflicts before a single fixture is purchased.
A simple compass remains useful for confirming south-facing orientations, and a basic inclinometer or even a protractor can help verify panel tilt angles relative to your local latitude.
For properties with complex topography or significant tree coverage, taking a series of photographs from ground level in each cardinal direction across all four seasons builds an invaluable reference library. These images make year-over-year comparisons straightforward and allow you to detect gradual changes — like a growing tree's expanding canopy — before they become performance problems.
Building a Living Placement Strategy
The most effective solar lighting installations are not designed once and forgotten. They are managed as living systems, with periodic reassessment built into an annual maintenance routine. A brief seasonal walkthrough — perhaps timed to coincide with daylight saving time changes — takes no more than thirty minutes and can reveal placement adjustments that meaningfully improve system performance.
At Corona Solar Light, we encourage homeowners to think of their property not as a static backdrop for solar fixtures but as a dynamic environment that rewards careful, ongoing observation. The sun moves. Trees grow. Structures are added and removed. A placement strategy that accounts for these changes ensures that your solar lighting investment continues to deliver reliable, efficient performance through every season of the year.